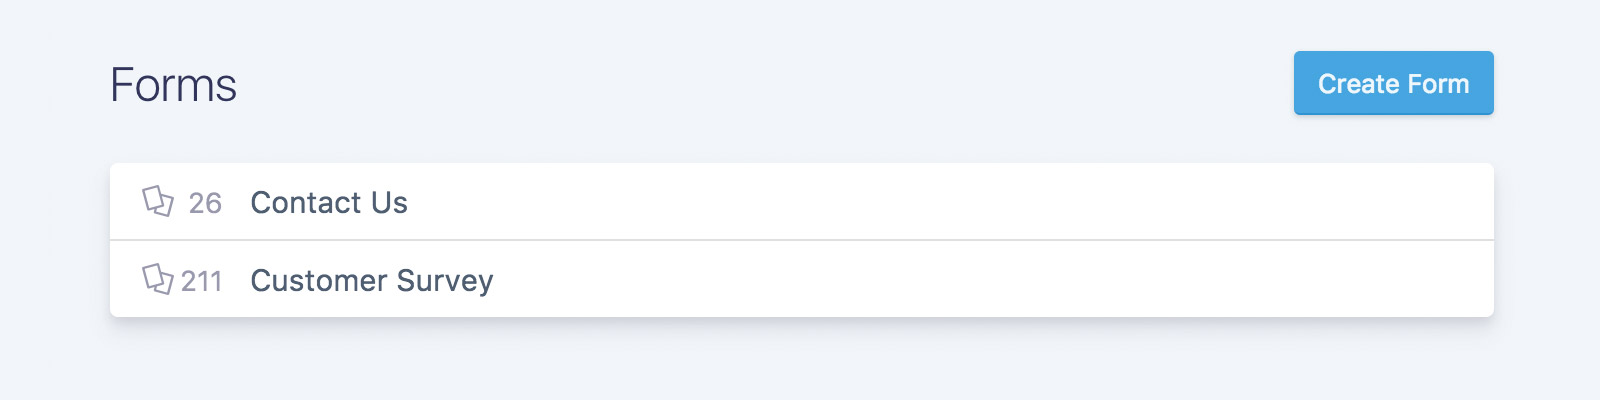
Forms
Forms are a natural part of the internet experience and a core component of most websites in some shape or form. From "Contact Us" to "Vote for Your Favorite Porg", Statamic can help manage your forms and make your life a little easier.
Overview
Statamic forms serve to collect, report, and reuse user submitted data. The end-to-end solution includes Tags, settings, and a dedicated area of the Control Panel. And yes, “Forms” is a pretty boring title. But at least it’s fairly clear as to what it does.
Your First Form
Let’s pretend, shall we, that you are a famous celebrity with a large following of dedicated fans. If that is true of you — kudos by the way — but why are you building your own website? You don’t have time for that. Who’s going to sail your yacht?
Okay let’s just pretend you’re a famous celebrity’s web developer. You’ve been tasked with collecting electronic fan mail (we’ll call it ef-Mail). You want to collect the following bits of info from crazed enthusiastic fans:
- name
- age
- level of adoration (appreciation, fixation, or obsession)
- message
Create the formset
First, head to /cp/forms in the Tools area of the Control Panel and click the Create Form button. Alternately you can create a .yaml file in site/settings/formsets which will contain all the form fields and settings.
Each form should contain a title and a set of fields with validation rules. Optionally it may also have metrics and email configuration.
Once configured you will have a formset file that looks something like this:
title: Super Fans

fields:
  name:
    display: Name
    validate: required
  age:
    display: Favorite Number
    validate: required|integer
  adoration:
    display: Level of Adoration
    validate: required
  message:
    display: Message
    validate: required
Next you can check out some of the other Form Tags available to you to display any errors, show a success message, and so on. We’ll keep this example brief and you can explore those at leisure.
The Template
Next, we need to set up the form in your template. There are two basic ways to markup your form’s HTML. The first is to loop through your form’s fields like so:
{{ form:create in="superfans" }}
  {{ fields }}
    <label>{{ display }}</label>
    <input type="text" name="{{ field }}" value="{{ old }}" />
  {{ /fields }}
{{ /form:create }}
Alternately, you can take a full-control approach and write out all the inputs yourself explicitly. This is useful when all of your fields aren’t uniform — when certain aspects require more control. In this case, your template might look more like this:
{{ form:create in="superfans" }}
  <label>Name</label>
  <input type="text" name="name" value="{{ old:name }}" />

  <label>Age</label>
  <input type="text" name="age" value="{{ old:age }}" />

  <label>Level of Adoration</label>
  <select name="adoration">
    <option>Appreciation</option>
    <option>Fixation</option>
    <option>Obsession</option>
  </select>

  <label>Your Message</label>
  <textarea name="message">{{ old:message }}</textarea>

{{ /form:create }}
Viewing Submissions
The Control Panel enables you to explore the collected responses, configure dashboards with reporting metrics, and export that data to CSV or JSON formats.
You can jump back into your form’s settings and pick which fields you want shown, as well as configure metrics you’d like shown above your responses. Here’s an example:
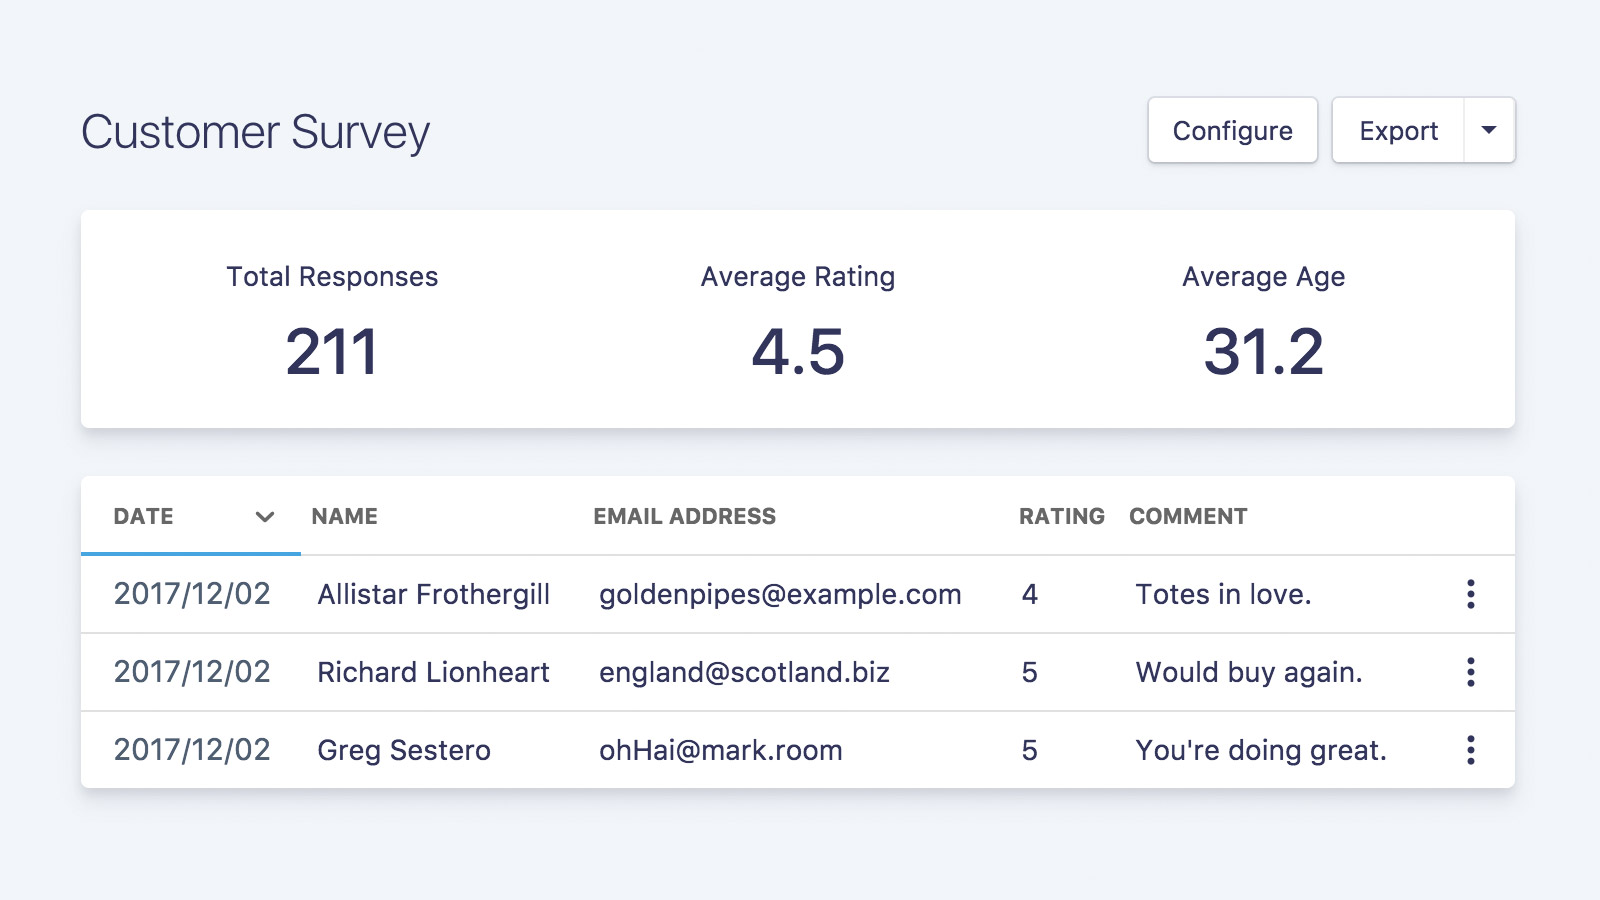
These metrics would have a configuration like this:
metrics:
  -
    type: total
    label: Total Responses
  -
    type: average
    field: rating
    label: Average Rating
    precision: 1
  -
    type: average
    field: age
    label: Average Age
    precision: 1
You have access to average, sum, min, max, and total metrics that can be applied to any field in your form.
Displaying submission data
You can display any or all of the submissions of your forms on the front-end of your site using the formsubmissions Tag.
<h2>My fans have said some things you can't forget...<h2>
{{ form:submissions in="superfans" limit="15" }}
  {{ message | markdown }}
{{ /form:submissions }}
Exporting your data
Exporting your data is as easy as click the Export button when viewing your form in the Control Panel. You have the choice between CSV and JSON. Choose wisely.
Emails
Allowing your fans to send their comments is all well and good, but at this point you will only know about it when you head back into the Control Panel to view the submissions. Wouldn’t it be better to get notified? It’s simple to send an email when a form is submitted.
You can add any number of emails to your formset.
email:
  -
    to: hello@celebrity.com
    from: website@celebrity.com
    subject: You've got fan mail!
    template: fan-mail
  -
    to: agent@celebrity.com
    subject: Someone still likes your client
    automagic: true
Here we’ll send two emails for every submission of this form. One will go to the celebrity, and one to the agent. The first one uses a Statamic template, the other gets an “automagic” email. The automagic email will be a simple list of all the fields and values in the submission.
Setting the Recipient Dynamically
You can set the recipient to an address submitted in the form by using the variable in your config block. Assuming you have a form input with name="email":
email:
  -
    to: "{{ email }}"
    # other settings here
Setting the “Reply To” Dynamically
You can set the “reply to” to an address submitted in the form by using the variable in your config block. Assuming you have a form input with name="email":
email:
  -
    reply_to: "{{ email }}"
    # other settings here
Learn how to create your emails
File Uploads
Sometimes your fans want to show you things they’ve created, like scissor-cut love letters and innocent selfies with cats. No problem! File input types to the rescue. All you need to do is inform Statamic that you intend to collect files, specify where you’d like the uploads to go, and whether you’d like them to simply be placed in a directory somewhere, or become reusuable Assets.
First up, add files="true" to your form tag. (This will add enctype="multipart/form-data" to the generated <form> tag. That’s always so difficult to remember.)
{{ form:create formset="contact" files="true" }}
...
{{ /form:create }}
Then the fields:
<input type="file" name="simple" />
<input type="file" name="fancy" />
fields:
  simple:
    type: file
    destination: uploads/
  fancy:
    type: asset
    container: uploads
    folder: fan-art
Simple Uploads: Set type: file and a destination (path from webroot). That’s it.
Asset Uploads: Set type: asset, specify the asset container via handle or ID, and which folder inside said container.
Multiple files
You have two methods available to you:
First, You can create separate fields for each upload. This is useful if each has a separate purpose, like Resume, Cover Letter, and Headshot. You’ll need to explicitly create each and every one in your formset.
Or, you can enable multiple files on one field, by setting type with the plural form of the type option, files or assets, and indicating an array in your input by adding a set of square brackets to the name attribute.
<input type="file" name="many[]" multiple />
fields:
  many:
    type: files
    destination: uploads/
If you use the square bracket
namesyntax, but use the singulartypein your formset, only the first selected file will be uploaded. Don’t forget to set both.
Honeypot
Simple and effective spam prevention.
The honeypot technique is simple. Add a field to your forms, that when filled in will cause the submission to fail. Hide this field a method of your choosing (ie. CSS), so your users won’t see it but spam bots will just think it’s another field.
For example:
{{ form:create }}
    ...
    <input type="text" name="honeypot" class="honeypot" />
{{ /form:create }}
.honeypot { display: none; }
If you’re worried about smarter spam bots realizing that the honeypot field is named honeypot, you may customize the
name of the field by adding honeypot: something to your formset.
We say the submission will “fail”, but that’s not exactly true. On the front end it will appear that the form was submitted successfully. However, nothing will get saved and no emails will be sent. This is the key to tricking bots into believing everything went smoothly.
Using AJAX
To submit the form with AJAX, be sure to pass all the form inputs in with the submission, as Statamic sets _token and _params, both of which are required.
You’ll also need to set your ajax library’s X-Requested-With header to `XMLHttpRequest’.
Axios Example
window.axios.defaults.headers.common['X-Requested-With'] = 'XMLHttpRequest';
form = document.getElementById('form');

// On submit...
axios.post(form.action, new FormData(form))
  .then(response => {
      console.log(response.data)
  });